What is an ollie and why does it matter for a new skater? The ollie is a jump on a skateboard. It lets a skater lift the board without using hands. This move starts many other tricks. The guide explains what is an ollie, how to do it, common mistakes, and clear progressions.
Key Takeaways
- An ollie is a fundamental skateboard jump that allows skaters to lift the board without using their hands and is essential for progressing to advanced tricks.
- Mastering foot positioning with the front foot near the middle and back foot on the tail, along with bending knees and maintaining weight over the bolts, is crucial for a successful ollie.
- Common mistakes like underpopping, insufficient foot drag, leaning back, and poor landing alignment can be corrected through focused practice and video feedback.
- Learning the ollie builds timing, balance, and board control, forming the foundation for tricks such as pop shuvits and kickflips.
- Gradual progression by practicing ollies over obstacles, at increasing speeds, and adding rotations or flips leads to steady skateboarding improvement.
Why The Ollie Matters: Foundation For Modern Skateboarding
The ollie gives a skater control in the air. Many modern tricks need an ollie first. A skater uses the ollie to clear curbs, gaps, and obstacles. The ollie builds timing, balance, and board feel. When a skater learns what is an ollie, they gain access to pop shuvits, kickflips, and many street tricks. Skate coaches often teach the ollie before any flip trick. The ollie also helps a skater learn safe landing habits and board alignment.
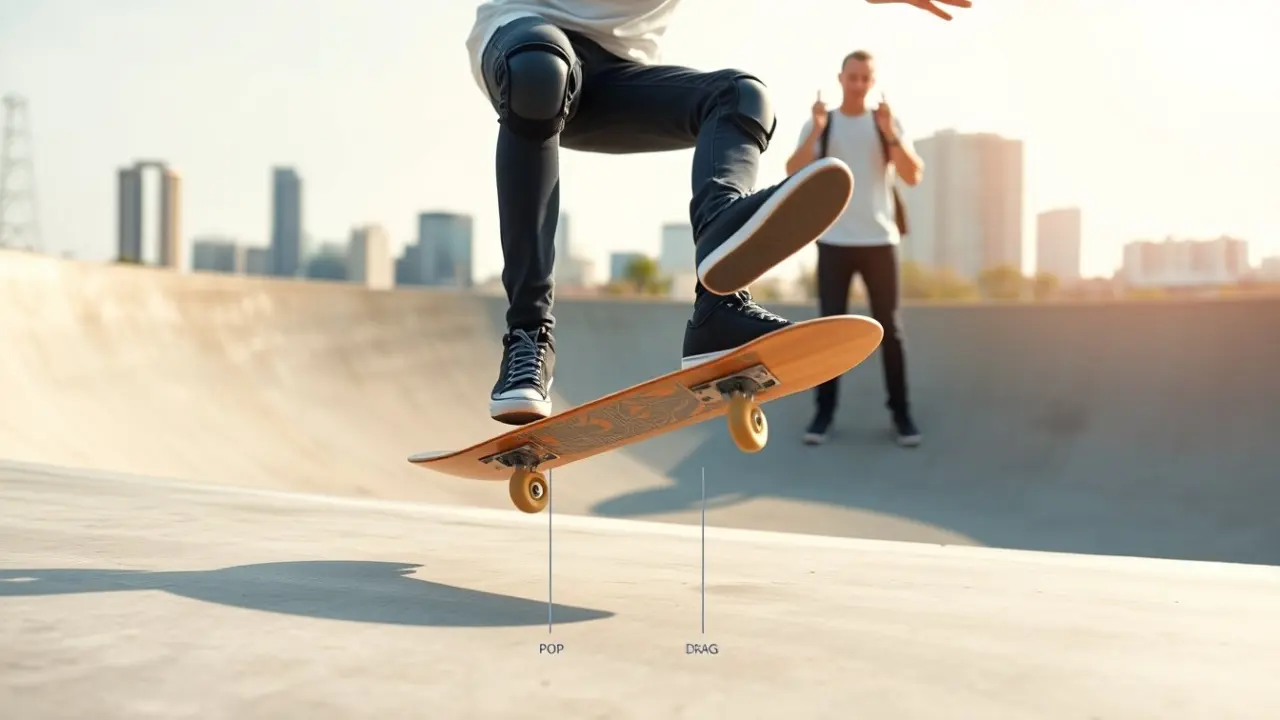
Beyond trick progression, the ollie trains core movement patterns: a coordinated downward pop, an upward jump, and a smoothing drag of the front foot that levels the board midair. Those same patterns show up in manuals, airs, and railroad-style ramps. Because it is both a technical and athletic skill, mastering the ollie improves timing, ankle and knee strength, and the ability to read terrain. For beginners it becomes the practical tool for navigating urban spots—curbs, steps, and small gaps—while giving a clear path to the wider vocabulary of skateboarding.
Step‑By‑Step Breakdown: How To Do An Ollie
A clear step sequence helps a skater learn what is an ollie. The sequence breaks into stance, motion, and landing. A skater practices each step slowly. Repetition builds muscle memory. The next three subheadings cover the stance, the pop/drag/level motion, and the landing.
Start by practicing on flat ground with one foot on the board and one on the pavement to feel the pop. Progress to both feet on the board and small, controlled pops before attempting higher jumps. Work each component separately—pop the tail without jumping, slide the front foot without a pop, and tap small jumps to coordinate timing—then combine them once each feels consistent.
Foot Positioning And Stance
A skater sets the front foot near the middle of the board. The back foot sits on the tail. A slight angle on the front foot helps the board slide. The knees bend. The weight stays centered over the bolts. The eyes look at the landing. This stance makes the first phase of what is an ollie repeatable. A skater keeps the shoulders aligned with the board. The skater practices small pops to feel the tail.
Details that matter: place your back foot with the ball of the foot on the corner of the tail to get a crisp pop, and keep the front foot across the width of the board with toes slightly hanging off the edge for better drag. Shoes with grippy soles and a secure lace setup help maintain consistent contact during the slide. For beginners, stand still and bounce in the stance until you can feel a quick, compact pop from the ankle and knee rather than a long sweeping motion.
Common Mistakes And How To Fix Them
A skater often underpops the tail. The fix is to commit to a sharper snap. A skater may not slide the front foot fully. The fix is to practice dragging the shoe up the grip tape. A skater may lean back and miss the landing. The fix is to keep weight centered and the shoulders over the board. A skater may land on the edges. The fix is to aim the feet over the bolts. Simple drills that isolate pop, slide, and landing reduce these mistakes. Video feedback helps a skater see the error.
Other frequent issues and practical corrections:
- Timing mismatch (popping too early or too late): slow the motion down and rehearse the sequence—pop, jump, slide—without speed, then gradually increase tempo.
- Not leveling the board: focus on a higher and longer slide of the front foot; exaggerate the drag during practice until the deck sits flat midair.
- Poor ankle lockdown at landing causing rolls: work on absorbing with bent knees and practice landing on both feet simultaneously, aiming for bolts and keeping shoulders square.
- Over-rotating or twisting: keep shoulders aligned with the board and spot the landing; if rotation is a problem, practice small ollies while standing still until the body learns to track straight.
Short drills: 50 small pops in place to build the snap, 30 front-foot-only slides up the grip tape to groove the leveling motion, and recorded attempts every 10 minutes to review posture and timing. Adjust one variable at a time—foot placement, pop intensity, or slide length—so improvements are measurable.
Progressions, Variations, And Next Tricks To Learn
After a skater masters the basic ollie, they try ollie over small obstacles. The skater increases gap size gradually. The skater practices ollie while moving faster. The next tricks include ollie 180, pop shuvit, and frontside 180. The skater works on flip tricks once the ollie is consistent. The skater can learn nollies and switch ollies for more skill. A steady practice plan with short sessions leads to steady progress. A skater tracks attempts and adjusts drills to improve what is an ollie in different setups.
Suggested progression plan (example sequence for several weeks): begin with daily short sessions focused on pop and slide drills, add moving ollies and small curb clears in week two, introduce low-speed ollie-over obstacles in week three, and begin controlled ollie 180s and pop shuvits once consistency is reached. Variations to explore include switch ollies (doing an ollie in your non-dominant stance), nollies (popping from the front), and ollie grabs on transition. Each variation reinforces board control in different weight distributions and foot positions.
When choosing next tricks, prioritize ones that reuse ollie mechanics: pop shuvits build the pop and scoop motion, ollie 180s train rotation control, and kickflips depend on a reliable level and slide. Keep safety in mind—use pads and spotters when attempting new heights or speeds, practice on smooth, debris-free surfaces, and warm up ankles and knees before sessions. With deliberate, measured practice that focuses on small, specific adjustments, understanding what is an ollie becomes the gateway to confident, creative skateboarding.